
Introduction to Computer Science Using Arduino
-
Lessons
-
Activities
Show all chapters
Show one chapter at a time
Show chapter and section titles
Arduino is one of the most widely used open-source low-cost microcontrollers across a wide range of industrial applications. The user-friendly RoboBlocky platform makes learning Arduino accessible to learners of all levels.
This FREE Introduction to Computer Science Using Arduino curriculum engages students in the fundamentals of computer science through physical computing and electronics using Arduino. The course emphasizes core concepts related to hardware interfaces using Arduino. Students will also explore the basics of electronics and how Arduino responds to various sensors. Students will learn to control digital devices, such as LEDs, ultrasonic sensors, and joysticks using the Arduino commands. They will then apply their learning by designing and building imaginative prototypes through collaborative team projects. At the conclusion of the course, student teams will present their final projects.
Unit 1 introduces students to electronics and physical computing through hands-on activities using an Arduino board and electronic components. Unit 2 expands on this foundation by guiding students in using a breadboard to wire circuits with an Arduino. This unit may be skipped for younger students or lower grade levels. For classrooms without access to physical Arduino boards, the Appendix provides an introduction to controlling an Arduino using RoboBlocky’s virtual LED simulation. This reinforces fundamental concepts in a virtual environment and can be especially useful while awaiting the arrival of Arduino kits or for exploring the RoboBlocky platform as a tool for learning Arduino.
The curriculum serves as an introduction to computer science with physical computing and is suitable for integration into other existing courses in computer science, science (NGSS), engineering, and robotics for grades 3 through 12. It can also be used in afterschool and summer programs.
The low-cost hardware requirements for Units 1 and 2, along with Arduino setup instructions, are provided at the end of the page.
Unit 1. Electronics and Physical Computing with Arduino
1.1 Software Setup

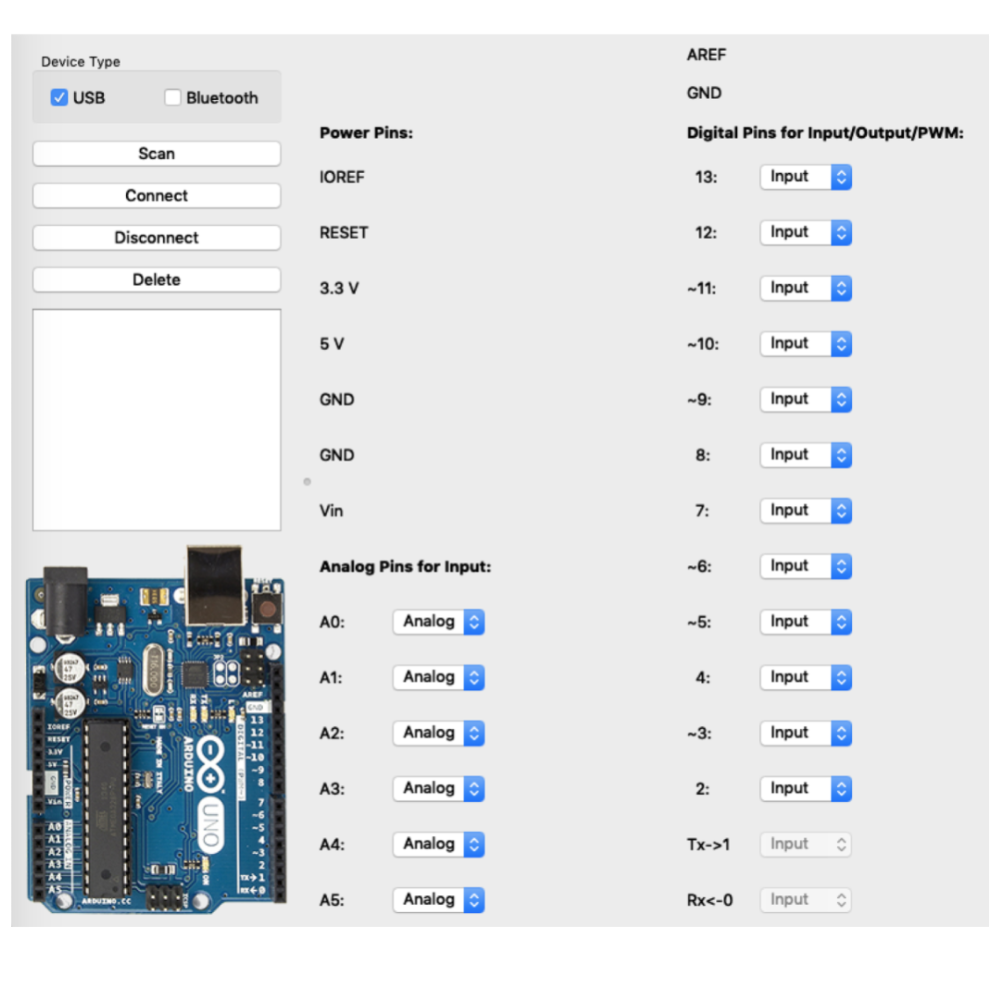
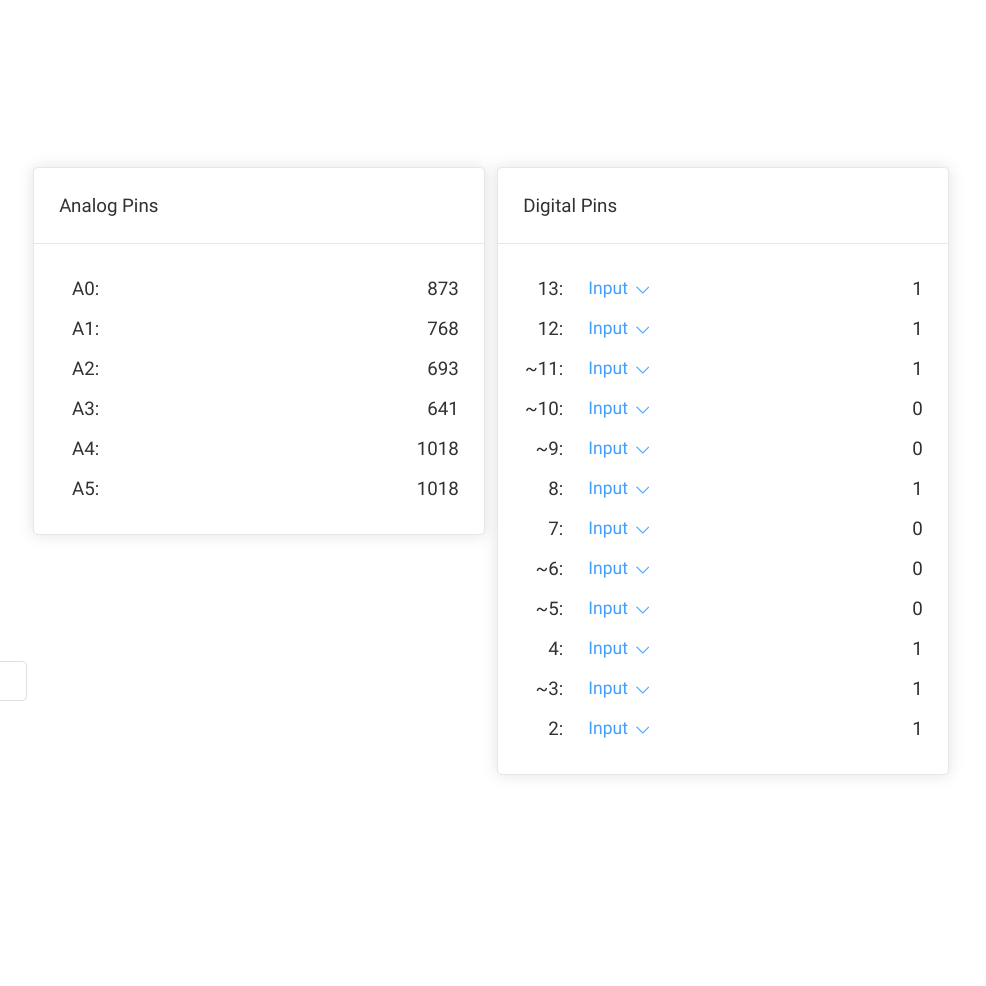
1.2 Setup and Test Hardware for Windows/Mac


1.3 Setup and Test Hardware for Chromebooks
1.4 Arduino Debugging Tips

2.1 Single Blinks


2.2 Multiple Blinks


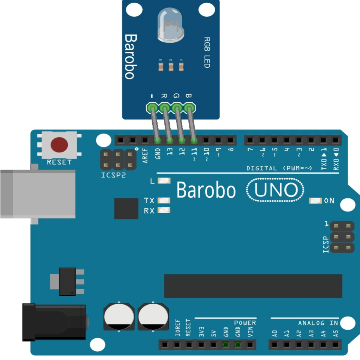
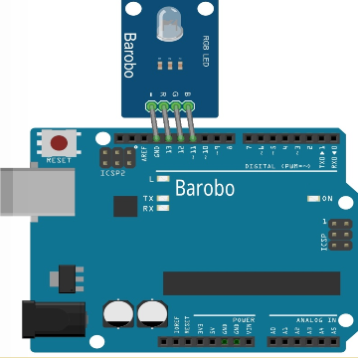
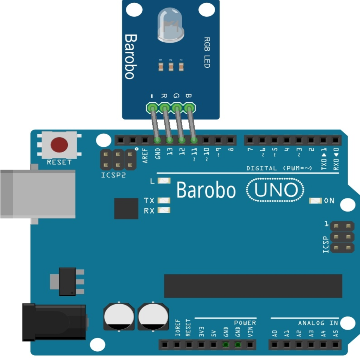
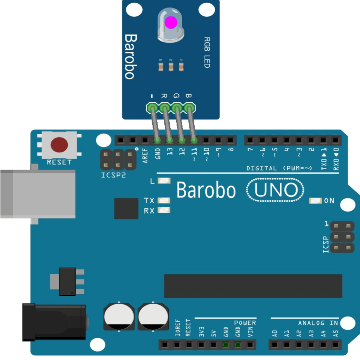
2.3 Blink an RGB LED Module Using digitalWriteHighLow


2.4 Repeated Blinking Using Loops

3.1 Program Linkbot and Arduino Together

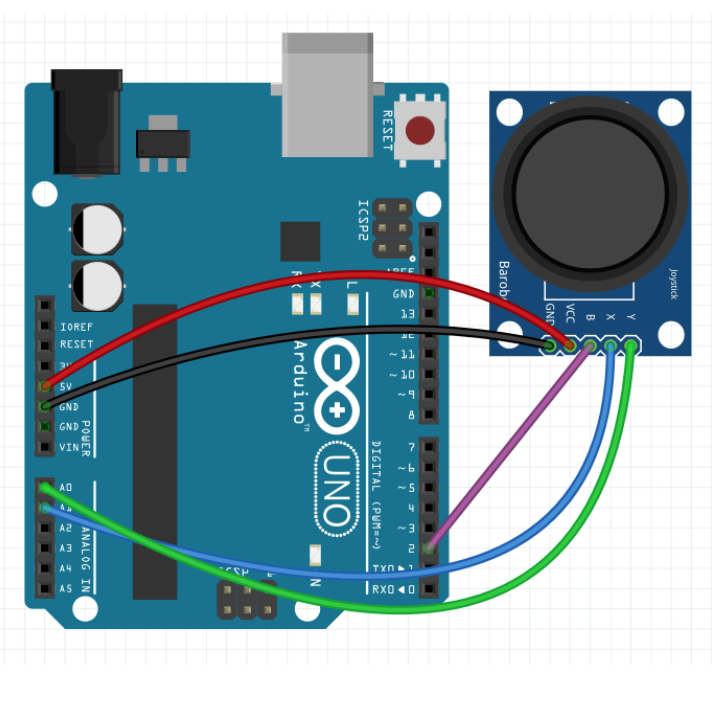
4.1 Use a Joystick with Analog and Digital Input


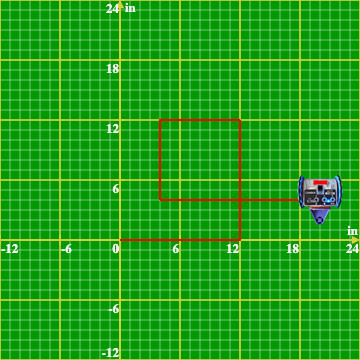
4.2 Use a Joystick to Drive a Linkbot Robot

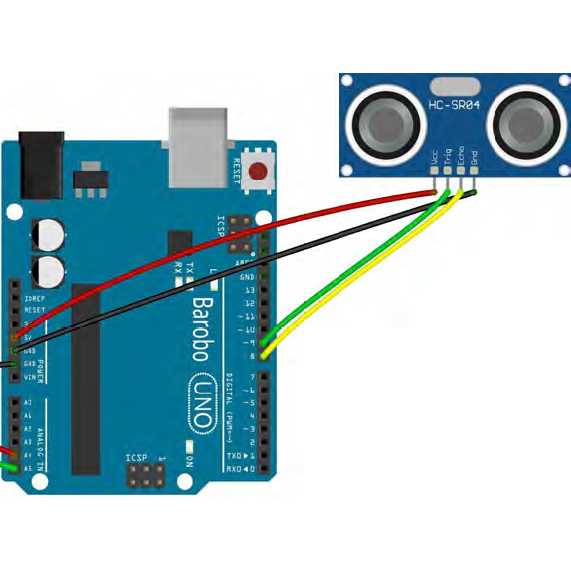
5.1 Use an Ultrasonic Sensor to Measure Distance


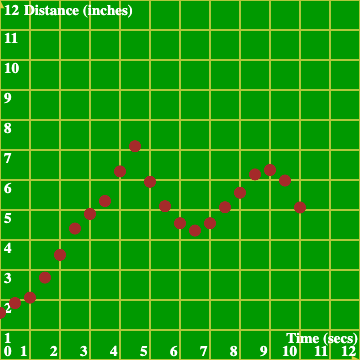
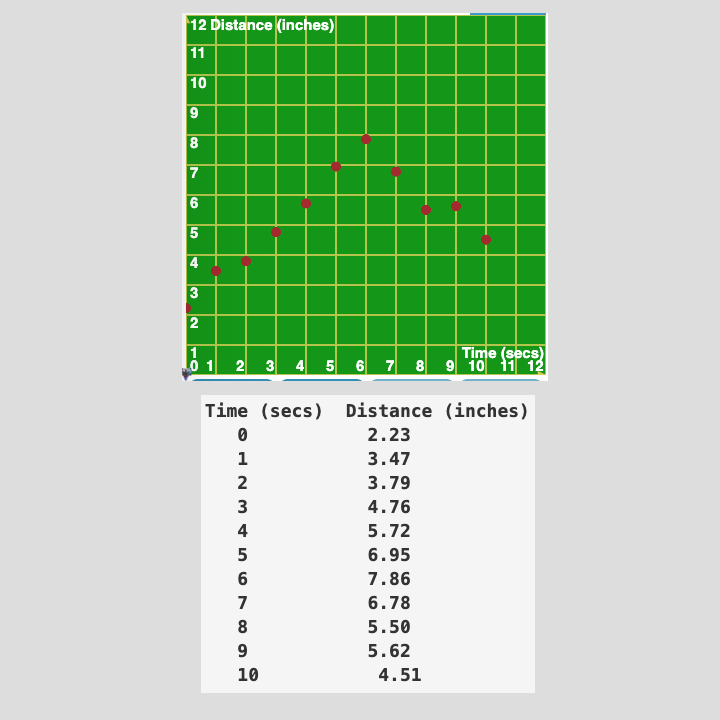
5.2 Plot Distance vs. Time with Ultrasonic Sensor
Unit 2. Electronics and Physical Computing with Arduino and a Breadboard
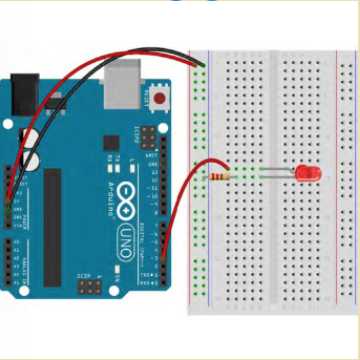
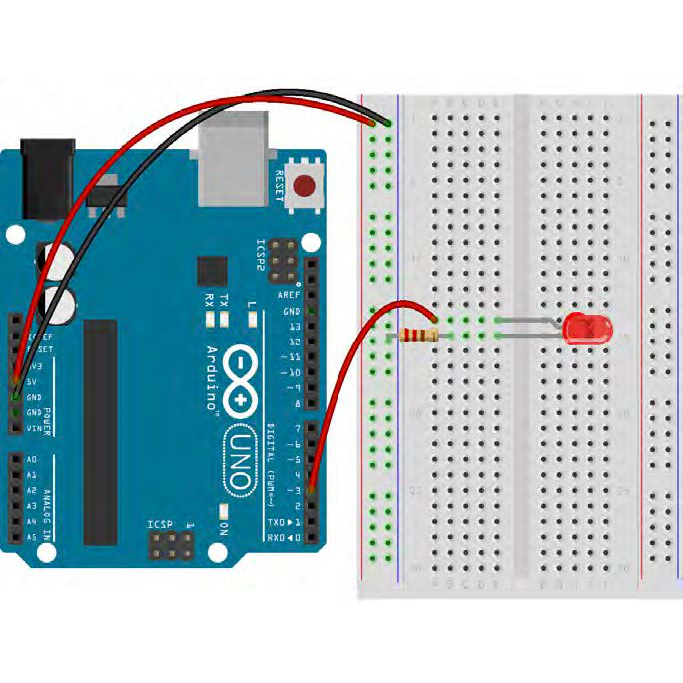
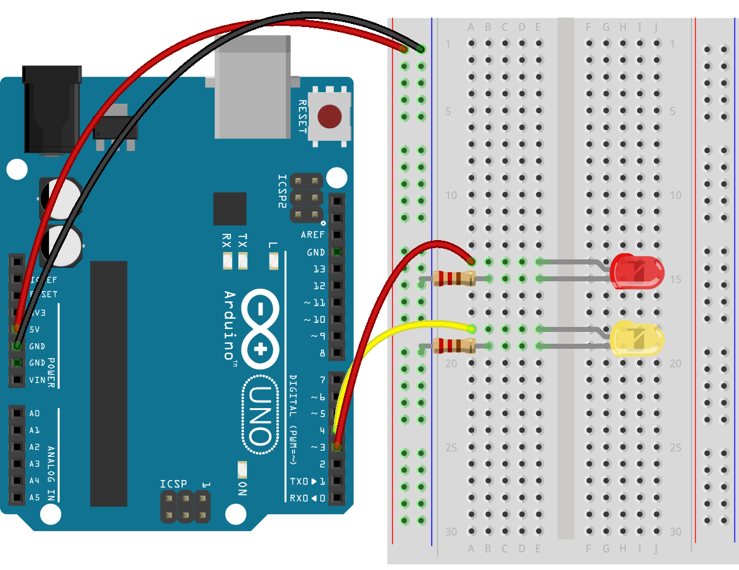
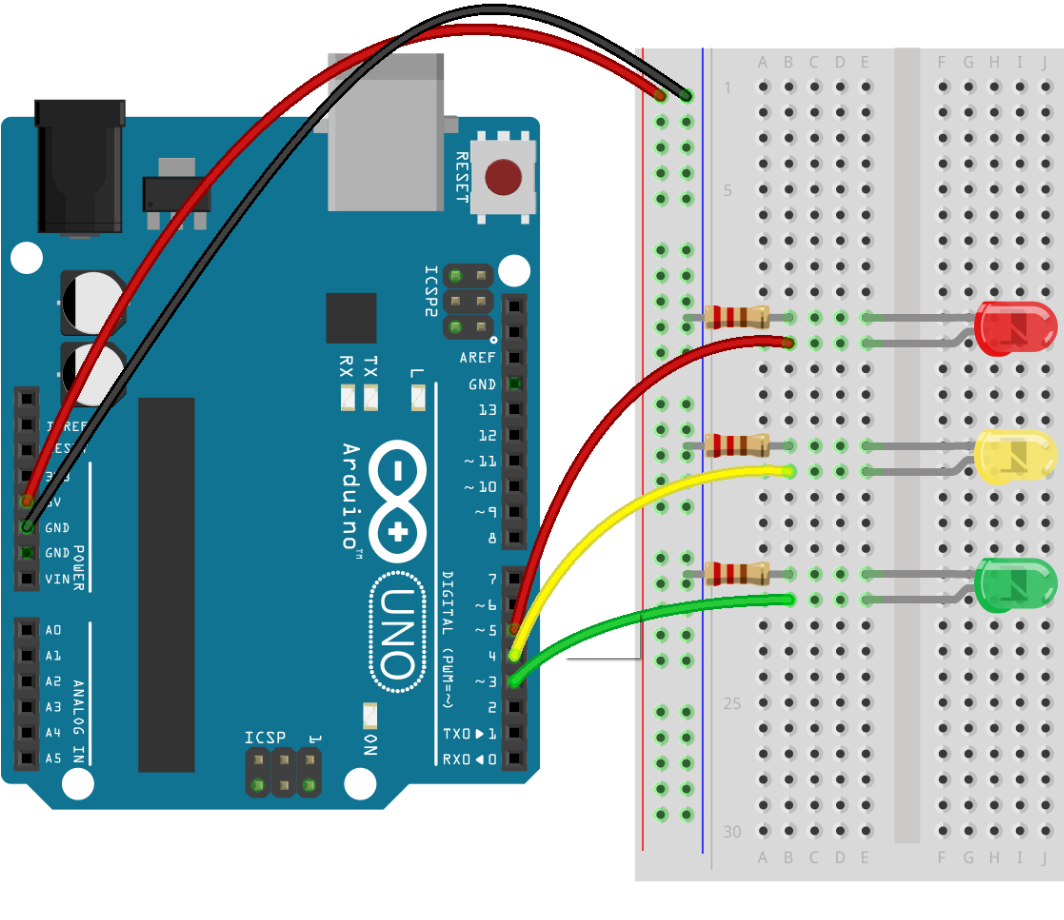
6.1 Blink LEDs Using a Breadboard


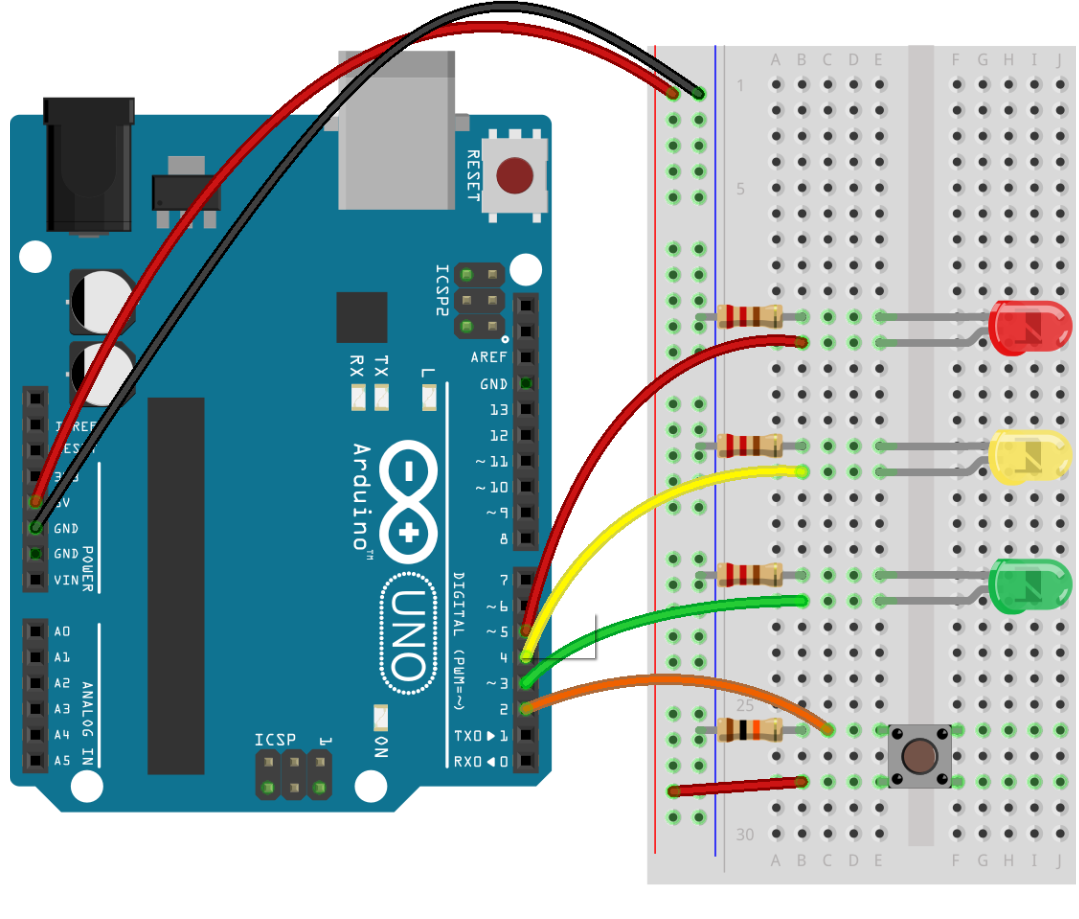
6.2 Control a Traffic Light with a Push Button for Digital Input
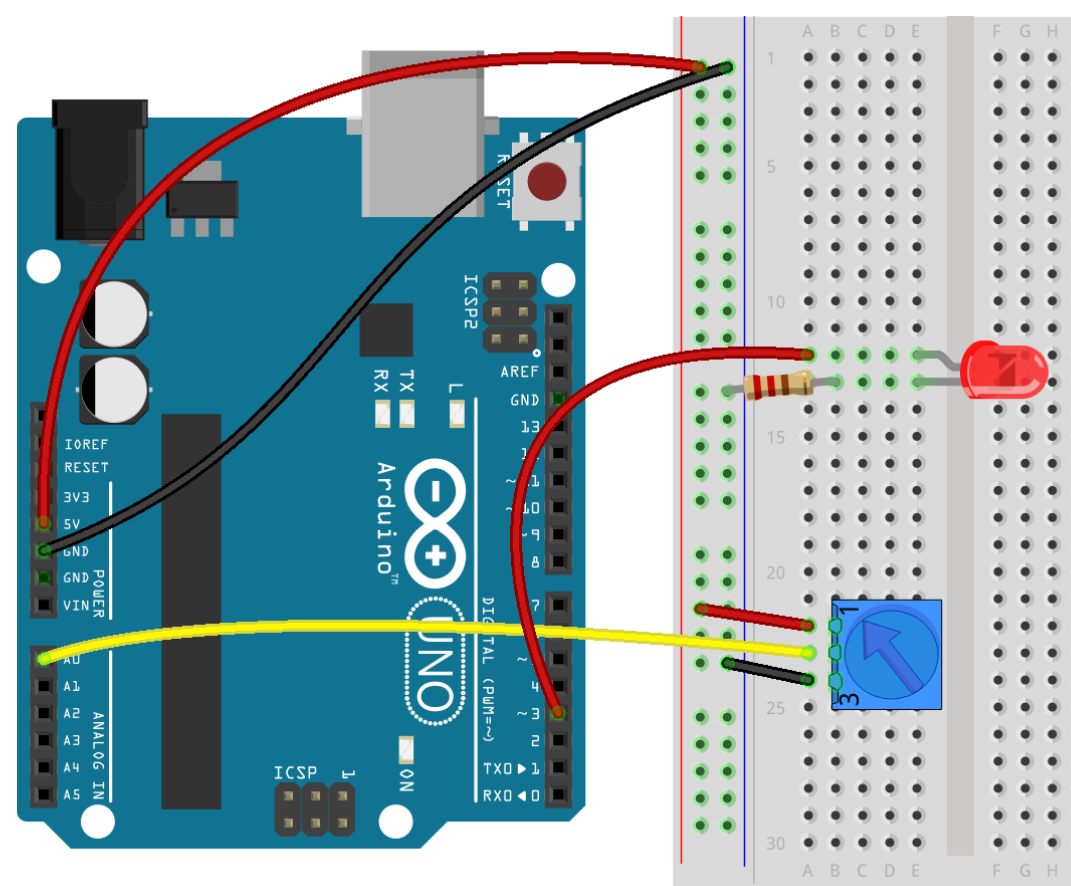
7.1 Use a Potentiometer for Analog Input
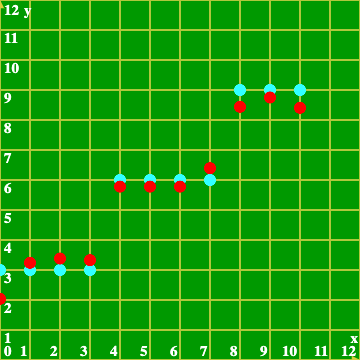
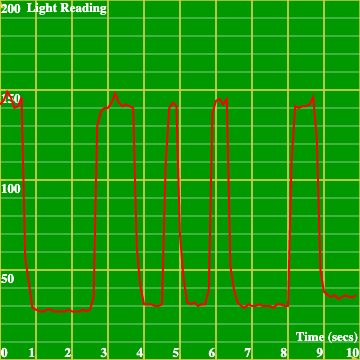
8.1 Data Acquisition and Plotting Using a Photo-resistor
Appendix: Virtual Arduino Simulation
9.1 Control a Virtual RGB LED Module


9.2 Blink an RGB LED Module using virtualWriteHighLow


Hardware needed for Unit 1:
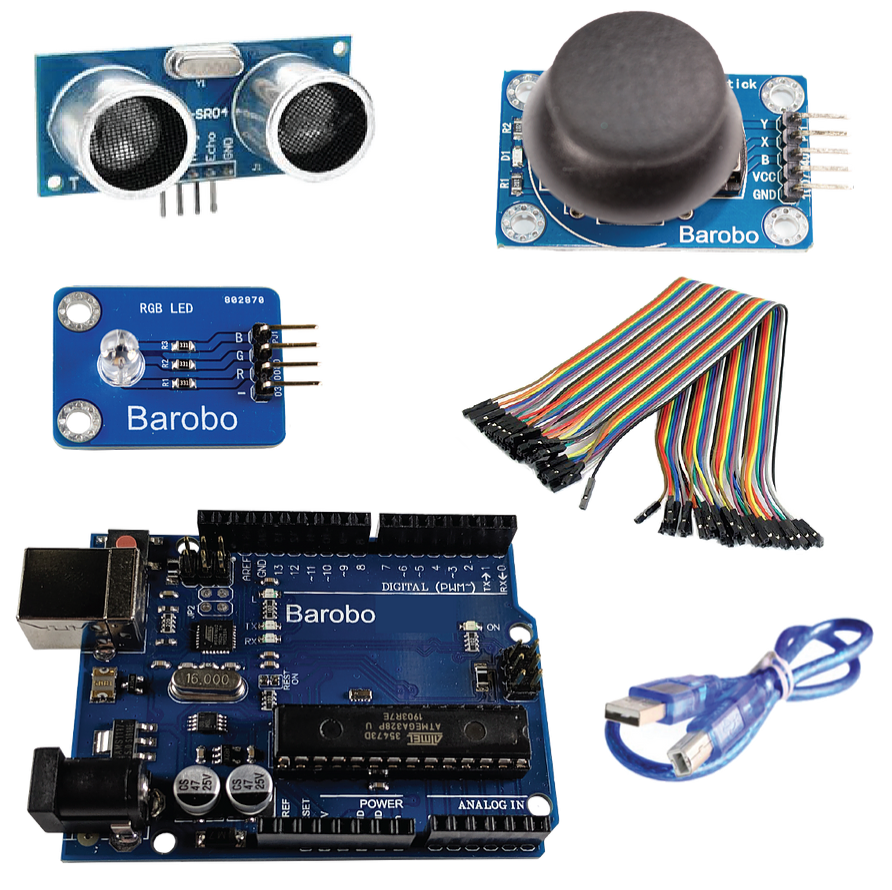
Barobo Arduino-Compatible Basic Kit:
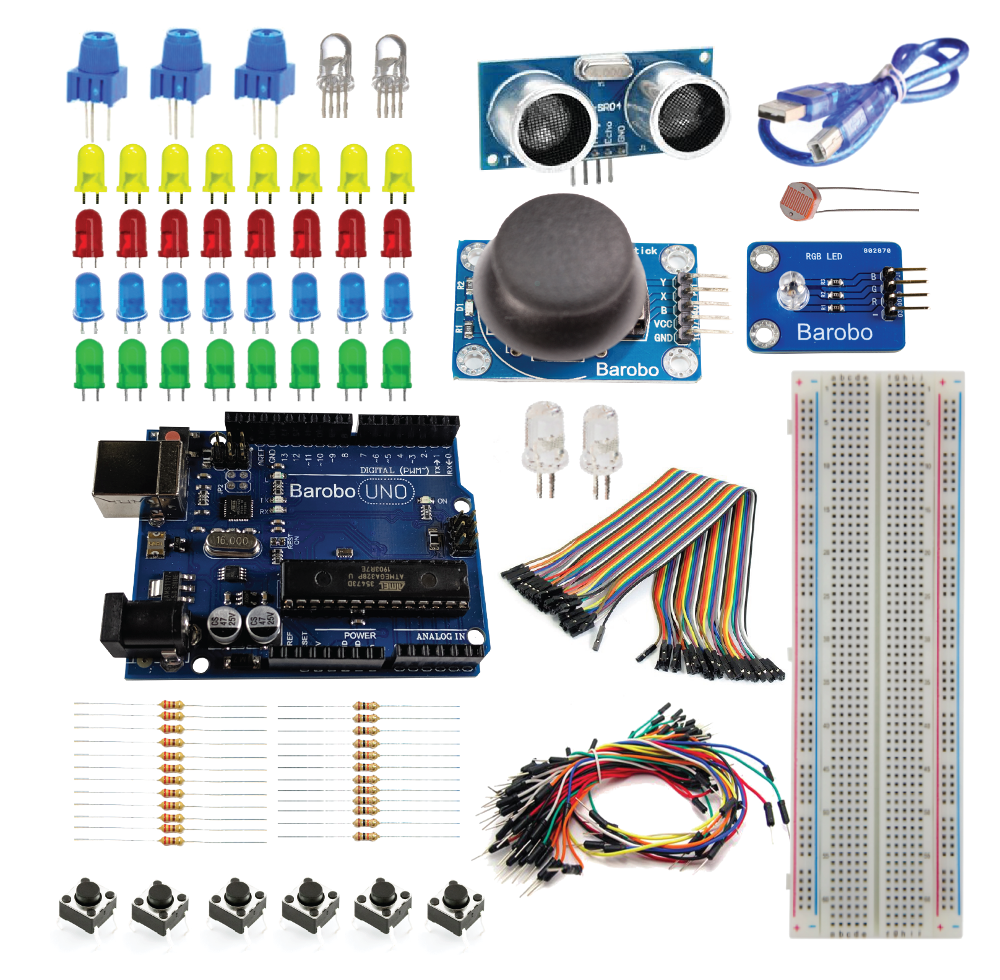
Hardware needed for Units 1 and 2:
Barobo Arduino-Compatible Starter Kit:
Software needed:
RoboBlocky at www.roboblocky.com (free)
Windows and MacOS machines: Install free ChDuino software (see Section 3 of the Arduino Setup Instructions file below for instructions).
Chromebooks: Install free Arduino Controller extension (see Section 3 of the Arduino Setup Instructions file below for instructions).